×

Happy to Help!

This website doesn't store cookies. Enjoy the experience, without worrying about your data!

Great, thanks!

Monthly Archives: July 2021

  • 0

Common Customer Success Teams Mistakes that Should be Avoided

Success of any company is built on customers and their loyalty. A great customer service opens room for renewals and promotes opportunities. To achieve a greater level of customer success, a dedicated team should be functional which can focus on the customer and their journey with your product and services.

A customer success team helps your customers to achieve their goals by proactively communicating with them throughout their journey with your company. Customer success teams are responsible for optimizing a meaningful relationship between your company and potential customers.

But nevertheless, one should take time to introspect the objectives and address the mistakes that occur during the customer journey process. Few slip-ups can be resolved quickly but certain errors require substantial changes within the team.

In the following section, we will quickly walk you through the most common mistakes that customer success teams make along with a few tips to avoid and overcome them:

  • Missing out the bigger picture while being preoccupied on the everyday
  • Working towards the objectives of the company is a key component of any customer success team but one needs to tread this path meticulously.

    Accomplishing goals from one quarter to the next does not promise good and long-term relationship. So, what have you missed?

    Customers have requests and needs that change frequently and it might be difficult to prioritize all of them for your company. At times they might not even know that they need a particular feature or property until they see it somewhere else.

    Companies are so occupied in the day-to-day activities that they might lose the sight of organization’s bigger initiatives or industry trends. This might hamper the overall performance of the team.

  • Interaction without intent
  • Do you frequently send emails to your customers and keep them posted with new features and ask their wellbeing? If yes, then great but then you should ensure that it shouldn’t be overbearing for customers. Just “checking-in” emails will do more harm than good and might spoil the deal with a potential customer.

    Companies should aim at providing value and build mutual trust and respect. Always offer services based on strategic insights, targeted suggestions and right perspective.

  • Lack of proper communication during the time of crisis
  • Crisis may arise in the companies internally or from external factors. During these times, the customer success teams are bombarded with calls and emails asking for an explanation or update and information about the situation. It can be tedious for the team and enticing enough to avoid the calls or interaction with customers. But it’s an absolute No-No. It can affect your relationship with the customer, and you might lose them in worst case.

    Provide Assurance – It is a known fact that when a crisis occurs in SaaS companies, it results in software outage. In such scenarios the first thing you must do is to acknowledge the crisis and share the initial information you have, with the team and customers based on how much they should know.

    The next step is to let customers know about the next update. It will help in building a reliable relation with customers in the time if crisis. Customers will anticipate that a solution will be found soon.

    Decide on who should be notified and when. Will just a message be enough to convey the situation, or should you come up with a customized mailer or calls? Determine these things and respond accordingly.

  • Last minute calls especially during “renewal” times
  • If you have not actively contacted a long-term or a stable customer in months and you try to reach out just before their contract renewal period expires, it is not a good move.

    You should create a customer journey map way ahead and determine when the call should be made to inform about the upcoming renewal and the new features, product and service workflows. All the interactions with customers and their journey with your company should have lifecycle diagram with stages and tie it as an engagement model.

    Customer success software like Freshsuccess (a flagship feature of FreshWorks) comes with an engagement model. They are created to help you achieve major lifecycle milestones. This model includes Quarterly business reviews (QBRs), monthly calls, bi-weekly usage updates, and boils down to individual touchpoints such as onboarding and survey feedback.

    Every Customer Success Team is Different

    There is no formula or sure shot way to build an incredible Customer Success team. It’s a relatively new concept in the industry and not many companies have one. So, each company’s success teams are bound to look different based on their goals and needs.

    The key to build a strong customer success team is to ensure that the success team is well coordinated with other existing teams in the company. It is also important that the customer success team functions as a strategic associate with your sales team.

    The success of any business is established on the customer success strategy. One wrong approach can spoil the entire infrastructure. You can make your vision become a reality provided you identify the issues quickly and resolve them efficiently.


    • 0

    Turbo Charge your Digital Commerce Journey with Magento Ecommerce

    Over the past few years, Magento as an ecommerce platform has emerged as the preferred choice of ecommerce business organizations and retail merchants seeking a profitable ecommerce journey.

    With around 2,50,000 active ecommerce sites running on Magento, the ecommerce platform, that was recently acquired by Adobe, accounts for 12% of all online stores as of June 2021.

    Magento ecommerce, was recognized as a Market Leader in its Magic Quadrant for Digital Commerce by global research and advisory firm, Gartner in 2020.

    Magic Quadrant for Digital Commerce

    In this blog, let us explore some of the key features of Magento ecommerce platform in more detail.

    About Magento Ecommerce

    What makes Magento ecommerce a favourite amongst the ecommerce community is the flexibility and ease it offers to build, model, integrate and launch a webstore in line with their ecommerce vision. In addition to being an open-source platform, Magento ecommerce offers granular control over your webstore UI & UX. Not only this, Magento Commerce also offers a wide array of easy plug-ins and extensions developed to help you deliver a memorable, shoppable and seamless experience to your customers.

    Magento 2 Benefits


    Previously, Magento Commerce was available in two versions viz. the Magento Enterprise Edition and Magento Enterprise Cloud. But now these versions have been unified into a premium, powerful and robust open-source ecommerce platform – the Magento Commerce. Launched as an enterprise-level platform, Magento Commerce can be leveraged by large sized business with higher business complexity, GMV (Gross Merchandise Value), multi-country presence and expansive product catalogs– etc.

    Evolution of Magento as a Leading Ecommerce Platforms

    Launched in the year 2007 by Roy Rubin and Yoav Kutner, Magento has evolved into a robust ecommerce platform over the past decade with many advanced feature additions and version and software update releases. Here is a chronology of key events in the history of the evolution of Magento as a leading ecommerce platform:

    Key Milestones in history of Magento eCommerce Platform
    Year Events
     

    2007

    First beta version of Magento software released by Roy Rubin and Yoav Kutner as part of project Varien
    2008 First product released under an open-source license
    2009 Owing to growing popularity the Enterprise edition is released
    2010 Rebranded the company name from Varien to Magento. Mobile version of Magento launched.
    2011 eBay acquires Magento. Paypal, then owned by eBay, is integrated into Magento
    2012-15 Magento 1 and Magento 2 and revised versions released
    2016 Release of Magento 2.1, Magento Marketplace, Magento Commerce Order Management, Magento Commerce Cloud
    2018 Adobe acquires Magento and integrates it into Adobe Experience Cloud. Towards October 2018, Adobe launched Magento 2.3 that enabled retailers to integrate their Magento e-stores with Amazon.
    2020 Adobe withdraws official support for Magento 1.x versions

    What are Top Features of Magento Ecommerce?

    In addition to being an open-source software, Magento ecommerce platform packs in an impressive array of customer reward programs, advanced marketing features, and targeted promotions –helping retailers in offering great experience to customers throughout their buying journey.

    1. Customize, Customize & Customize..
    2. Magento 2 comes with incredible options such as Themes, Modules, Language packs that let you offer a customize your ecommerce application as per your vision.

      While Themes lets you customize your ecommerce storefront UI and customer experience with custom templates, layouts, images and styles . Modules enable a seamless implementation of new functionalities in your ecommerce application. Language packs, on the other hand, comes handy for localizing your ecommerce store for multiple geographies and markets.

      Magento offers incredible options to customize the ecommerce solution with wide range of extension and plug-ins available at the Magento Marketplace. From order management extensions like split order, to advanced payment and security extensions, Magento Marketplace has one of the most extensive and versatile offering of testing and customization

      Split Order


    3. Robust Content Management: The drag-and-drop page builder incorporated along with the release of Magento 2.3, enables ecommerce store owners to create great on-page brand experience for their customers.
    4. Some of the key benefits of the Page Builder feature of Magento ecommerce include:

      • Customize your storefront designs to match your brand’s voice
      • Flexible content layouts, effortless and no-code page design
      • Drag and drop interface that enables marketers to own the complete content management process
      • Reusable dynamic blocks, in-line editing features help save time and resource in content creation

    5. A Highly Performance Optimized Platform:
    6. As per studies, webstores that take more than 3 seconds to load witness up to 40%-page abandonment. Thus, it is inevitable for all the ecommerce stakeholders to ensure that no matter what, their webstore is optimized for speed.

      In its new release, Magento ecommerce has strengthened its focus on ecommerce store performance and page optimization with reindexing. Reindexing helps in enhancing store performance and query speed by transforming site data such as product prices, catalog, stores, users by building index tables and updating them at intervals.

      Additionally, Magento Commerce also supports Full-page Caching at the server side. Full page caching helps in reducing the server load and enhancing the server response time to display site content without delay.

    7. Scale as your Business Grows: At its core, Magento is built for scalability and flexibility demanded by the modern ecommerce business. Magneto ecommerce’s  highly modular architecture not only simplifies application complexity, in fact it facilitates you to create/modify/customize any functionality within short span of time. To meet the growing demands of your e-business.

      With the release of Magento 2, Magento ecommerce claims to show a double-digit reduction in response times along with , increase in number of order processing capacity per hour, and overall improvement in capacity to handle increase in peak order volume , outsized customer lists -among others

    8. Integrated B2B and B2C solutions & functionalities: Magento ecommerce offers a unified instance that can cater to both B2B and B2C needs. With the unified Magento instance you can get to market faster by using the same mobile-first designs, responsive themes and other branding elements without having to go through the pain of managing multiple instances of your ecommerce website.
    9. Super-smart AI-powered Recommendation Engine:
    10. Latest version of Magento ecommerce, Magento 2 comes with AI- based visual product recommendation engines. Powered by Adobe Sensei, these recommendation engines invariably help ecommerce store owners to offer a more relevant and context-specific experience to their customers.

      Product recommendation engines

      Image: Product recommendation engines enhance the product serachability

      Adobe Sensei leverages Machine learning to display items visually similar to the ones customers are looking for, based on hues, and even textures. The logic is to enhance the searchability and thereby shopping experience of the customers by showing them products that share similar visual attributes such as patterns, textures, hues etc.

    Conclusion:

    Packed with rich content, commerce and cloud feature, Magento Commerce is definitely one of the most robust and powerful ecommerce platforms out there.

    As a trusted Magento development agency, Embitel has helped many retail brands and merchants in launching and running a successful ecommerce business on Magento ecommerce platform. Customers from varied industry verticals including retail, FMCG, CPG, telecom, fashion & lifestyle have collaborated with us for comprehensive Magento development services. This includes Consulting & advisory support, custom Magento development services In case you are interested, you may checkout some our customer success stories here.

    If you are looking to partner with a reliable Magento development company who can help you chart a successful ecommerce journey , get in touch with us.


    • 0

    How Ecommerce Gained Grounds in the Middle East Post Pandemic

    Post pandemic recovery is underway everywhere. The Middle East is no different from others, but it is winning the eCommerce sector steadily and how! The economy has been impacted in such a way that it has become a blessing in disguise to the marketers and retailers. It has paved the path for technology like never before.

    Today, consumers and businesses are moving to digital channels and the transformation is happening at a bigger level. According to a survey by Ernst & Young, shopping habits of almost 92% of consumers has changed in the UAE and Saudi Arabia.

    A large number of companies are already buying most of their supplies online and a majority of them predict that B2B ecommerce likely to become predominant in years to come. Electronics, computing, fashion and beauty industry are the sectors which will leverage this trend enormously.

    Albeit their financial apprehensions, it is notable that 49% of Middle Eastern respondents are willing to spend more in the coming months, as compared to China, France, Germany and the UK. However, one can expect the changes in their buying habits. Before the lockdown, consumers preferred travel, accommodation and entertainment. Consequently, post-Covid 19, consumers are willing to spend more on groceries, entertainment and media.

    Key Factors that Enabled Ecommerce Transformation

    Ecommerce Transformation


    • Expansion of Internet, smartphone, and broadband
    • In 2019, the Middle East had an estimated 174 million people using smartphones and about 67.2% internet expansion rate. This high percentage shows the connectivity range and tech savvy consumers in the region. Easy access to information, transaction speed and luxurious utilization at their fingertips are things that the consumers value here.

    • Digital Banking and Payments Architecture
    • With progress in digitization, one can clearly see the rise in digital banking (both mobile and online banking) in the Middle Eastern region.  When it comes to digital banking, MENA offers a high ceiling to the growth of e-commerce. More recent reports show that high digital banking penetration has transformed into high consumption by customers and over 85% of personal loans for a major bank in the UAE are opened digitally since 2019.

    • Supportive Administrative Setting
    • Ultimately, the growth of any economy hugely depends on a supportive regulatory environment. The Middle East has several initiatives and policies that encourage people to invest in e-commerce sector. One such initiative is CommerCity. It is an economic free zone customized for e-commerce opportunities. In 2018, the Arab League established the Arab Federation for Digital Economy, a beneficiary to the Arab Federation for e-Commerce, to ease cross-border and regional collaboration, representing the region’s enthusiasm for digital transformation.

    Benefits of Accelerating the Ecommerce Transformation

    • With a scalable channel to interact with customers, retain and attract customer spends, get ROI from the demand disruption that was caused during COVID-19
    • Aids in rising entrepreneurship and innovation. You can incentivize localization of e-commerce businesses and cost reduction in a badly-off environment
    • It has proven to be more convenient, offers more choices for customers, profitable prices; along with this, one can see a better and bigger market expansion with targeted engagement between businesses and customers via digital channels
    • This paves way to collaborate with regional and international markets and reach out to people globally.

    Surprisingly, the lockdown has made the consumers who previously resisted change to try out online retail channels. These customers are now willing to continue using online services even after the pandemic is over. It is certain that digital engagement by Middle East consumers will become influential and expand to new horizons for good. At the same time, it will now be a monumental responsibility on retailers’ part to make the best use of the insights and analytics and target customers and deliver customer expectations better.

    Another important point to note is that there are customers who are buying more products online and they might also be first time shoppers. They are exploring options like visiting the stores to check the catalogue and buying online. Cost and value addition will be of paramount importance for retailers as they have to pursue sophisticated, tech-savvy customers, both online and in-store. There has been an increase in requirement for digital payment gateway and credit solutions.

    In the wake of Covid-19, people have started giving prominence to health and wellness. This trend is gaining popularity and hence the spending patterns have also shifted for a section of consumers. Retailers should acknowledge this development and leverage the trend to reap benefits.

    At the same time the catchphrases that retailers should follow closely are flexibility and resilience. Businesses should cater to customers and meet their expectations with ease and customer loyalty should not be taken for granted.

    Some of the most ambitious companies have started developing the next level of retail marketing I.e AR (Augmented Reality). They are working with big guns of various industries or working towards pilots. The impact of virtual reality for shopping is extraordinary; imagine, you can indulge in the in-store experience from your living room. There has been a tremendous level of innovation over the past few months, with retailers largely utilizing technology to help online customers picture themselves trying out premium products.

    The Middle East Mall Experience: Yay or Nay?

    Eventually, it is a fact that, technology has not yet reached a stage where one can experience the products like they do in physical stores. The touch, feel, smell and interaction cannot be done online. We can safely say that a bridge between both, like hybrid shopping experiences where both online and physical stores are likely to be the norm.

    Middle East Mall


    We should not ignore the crucial social factor that malls play in the Middle East. People will continue visiting the mall for shopping, dining, entertainment and more with necessary measures of social distancing.

    The masterstroke here is to maintain a happy place where both digital and physical stores co-exist with a strong supply chain set up.

    In the past 14 years, Embitel has been helping its customers, both large and small sized businesses in charting a successful digital transformation journey. Check out our customer success stories to know how we have collaborated with leading business organizations to transform their digital strategy into reality.


    • 0

    Development of Volkswagen Specific Bootloader Development for an Automotive Tier-1 Customer


    About the customer

    Our customer is a prominent tier-2 supplier of electronics and mechanical systems for various industries, automotive being the most crucial one.

    Business Challenge

    Every ECU needs a flash bootloader for ECU flashing and re-programming. For one of their recent projects our customer wanted such a bootloader solution, but with some specific requirements. One of the major requirements entailed the bootloader to be specific to Volkswagen OEM guidelines. Every OEM configures their bootloader with re-programming strategies and data integrity mechanisms specific to them.

    These parameters may be related to how data is communicated, kind of seed-key algorithms in place and various other aspects. Developing a VW specific bootloader over UDS from ground-zero would mean at least 6 months of development time which would reduce the time-to-market further. A ready-to-deploy UDS software was the first requisite for this bootloader to work.

    Upon learning about our flash bootloader development capabilities and the prior customers that we delivered our bootloader to, the customer came on-board.

    Embitel Solution

    Our task was to provide a complete solution to enable ECU re-programming. Since the ECU was intended for VW, the flash bootloader software had to be developed as per the OEM specifications. The bootloader development also brought about the need for a UDS protocol software and a PC based ECU-reprogramming tool along with the low-level drivers for the Microcontroller unit on which the Bootloader will run.

    Microcontroller unit

    Our final deliverables to the customer were:

    UDS Stack- Service level configuration and DID level configurations were performed to our ready-to-integrate UDS protocol stack.

    Bootloader Development: Bootloader software was developed as per the OEM specifications which in this case was Volkswagen. Since we had worked on a somewhat similar Bootloader project before, we had the basic bootloader framework and architecture ready.

    PC based Re-programming tool: It was developed for re-programming the ECU as per Volkswagen specifications including data transmission mechanisms and seed-key algorithm. The tool was developed in QT based C++ environment.

    Low-level drivers: Thanks to our vast library of platform software solutions, we could re-use our low-level drivers for this project.
     

    Embitel Impact

    50-60% of effort was saved since we had platform software ready for the microcontroller platform that our customer intended to use for their project. The ready-to-deploy UDS stack and Bootloader framework also contributed to faster time-to-market for the solution.
     

    Tools and Technologies

    IAR Embedded workbench: Compiler used for development

    QT, C++: A cross-platform application and UI framework used to write applications for multiple platforms.

    Vector Hardware Interface: Acts as an interface between the PC based software and embedded hardware

    CAPL Script: A scripting language used to access CAN protocol for simulation purposes


    • 0

    AEM as a Cloud Service and Magento Integration Local Setup Guidelines

    AEM(Adobe Experience Manager) and Magento Integration are the best in the eCommerce world. Imagine the amazing advantages it offers when combined? This blog has covered the step-by-step guidelines of setting up AEM cloud service and Magento integration.

    AEM Commerce as a Cloud Service

    AEM as a cloud service has launched AEM Commerce as a cloud service. It is Adobe recommended to integrate ecommerce services from Magento and other third-party commerce solutions with AEM.

    Earlier versions of AEM, we had a CIF (Commerce Integration Framework)-connector to integrate Magento. But now a CIF add-on is available at the Software Distribution portal from where we can download the latest version of CIF add-on and integration is easier.

    The AEM CIF Core Components project serves as accelerator to get started with projects using AEM, CIF and Magento. The project contains re-useable Commerce core components which combine server-side rendered AEM components with client-side React commerce components (MPA) for dynamic experiences / data.

    Usually, Magento Sandbox URL Integration on local would throw CORS issue for the connection and we have designed the solution for the same.

    Setup AEM Commerce as a cloud service with CIF add-on on our store-front ecommerce project

    Some of the pre-requisites for the setup are:

    – AEM as a cloud service SDK (Software Development Kit)
    – Java 11
    – Node.js
    – NPM (Node package Manager)

    1. Latest CIF add-on should be downloaded from Adobe Software Distribution Portal. This would be a ZIP file which contains the respective far file as add-ons for our author and publisher environments.
    2. Download latest AEM as a cloud service SDK.
    3. Unpack the jar by running java -jar <jar_name> -unpack in the command line to create a quickstart folder (This is just un-pack, hence AEM wouldn’t start)
    4. Once quickstart folder is created, create install folder under quickstart
    5. Unzip the package CIF-addon and copy .far file which include (author) in file name for author environment and (publish) in file name for publisher environment.
    6. Create environment variable named as COMMERCE_ENDPOINT and provide Magento URL provided in sandbox.
      COMMERCE_ENDPOINT


      And add the COMMERCE_ENDPOINT into path as %COMMERCE_ENDPOINT%

    7. Start AEM by running java -jar aem-author-p4502.jar through command line.
    8. Now we can see commerce under localhost: 4502/aem/start.html
    9.  

      Navigation


    10. Setup the proxy server for Magento Endpoint so that the endpoint is available in local for CIF add-on and the CIF core components to bind products into commerce console.

      Proxy Setup

      Run the following command

      npx local-cors-proxy –proxyUrl <magento_endpoint_url> –port 3000 –proxyPartial “”

      When setting up the proxy server, provide your Magento endpoint without “/graphQL”.

      Proxy would start stating proxy active and we can hit the URL http://localhost:3000 for Magento Instance

      Magento Instance
    11.  

    12. Once we have done installing Venia-Storefront on AEM localhost
    13. Goto – AEM Start Page – Tools – Cloud Services – CIF Configuration – Venia
      http://localhost:4502/libs/cif/shell/content/configuration.html/conf/venia
    14. Edit the properties of commerce folder and in advance TabProvide the URL -> http://localhost:3000/graphql
    15. advance Tab


    16. Basic Tab Properties as
    17. Basic


    18. Once after the configuration, we will be able to see the products in commerce console.

    This completes the integration between AEM Commerce and Magento Integration setup on local.

    Author Bio

    Chiran Kumar is our Associate Director with an impressive record in Application design and Architecture. For over 11.5 years. He has been at the helm of various digital experience and e-commerce projects for leading software organizations.

    Chiran has completed his post-graduation in Computer Applications from Al Ameen College, Bangalore. Apart from work… Chiran loves to nurture his passion for bikes and travelling.


    • 0

    A Complete Guide on Customer Journey Mapping and User Experience

    Customers are the core of your business plan, agree? To provide a great customer experience, you need to understand your customers. Treat them as a part of your venture.

    Customer journey is not limited to you selling a products/service and customers buying it. Today, it has just got deeper. Companies need to recognize user behavior with their product/service. When, how, and where customers connect with your brand is a study that is of utmost importance in order to thrive in the market

    Research shows that as much as 51% of the users move from a brand due to substandard customer experience and about 81% of the customers state that switching brands can be stopped if there is an improvement in the customer journey and customer experience.

    Let us address the elephant in the room now. What is your strategy to convert a visitor who has spent time on your site but hasn’t purchased anything? Are your customers happy with their experience and your service?

    Lot of brands do not understand/perceive their customers as individuals. It is a fact. They are not entities but individuals who expect that they get better returns for what they are paying for a product/service.

    Businesses should ensure that they help customers by meeting their expectations and thereby accomplishing their company’s objectives. This should be a win-win situation for both. This gap can be bridged by using customer journey mapping approach.

    It is not an easy task to know your customers and what they are expecting?! Customer journey mapping or user journey mapping will help you make calculated decisions. However, you have to address the below criteria before going ahead with the customer journey mapping.

    • Recognize the objectives and plan the process.
    • Understand how to apply and utilize the user data and information accordingly.

    What is Customer Journey Mapping?

    Customer journey mapping, also known as user journey mapping, refers to designing a customer journey map with your brand. It is a visual representation of every touchpoint and pain point of your customers.

    This helps businesses to understand customer’s viewpoints and aids in improving their customer service.

    First and foremost, all of the customer touchpoints like website, social media platforms, interactions, chat history with sales and marketing teams, etc. are mapped out.

    User journeys for various touchpoints based on each buyer persona are created. For instance, the millennial buyer persona is that they will be aware of the product on social channels, read reviews and research on your brand’s mobile app, and finally purchase it on desktop or mobile itself.

    A customer journey map should include each step like this including how your brand response should be noted.

    Customer Journey

    Why is customer journey mapping important?

    Today customers expect omnichannel marketing and customer service. Irrespective of the size or type of the business, you should meet their requirements to thrive in the market. This is an apt approach where customers can receive support across various platforms like social media, messenger apps, or live chat.

    Customer journey mapping is a strategic way to better understand your customer expectations and realize ways to optimize the customer experience. Businesses should ensure that personalization is achieved at every turn in the journey for every user and across all channels.

    Customer journey mapping allows you to upgrade customer onboarding process. It helps you to understand different buyer personas as they move ahead from potential users to loyal customers in the sales funnel.

    B2B Customer Journey

    How Do We Use Customer Journey Mapping?

    Customer engagement is more than getting traffic to your site or increasing the number of likes and visits on your social media platforms. Authentic engagement is about co-operation and realizing a suitable way to co-exist for customers and businesses together. It is about how much of a difference is your product or service making in an individual’s lives.

    You should use customer journey mapping to understand that customers on different channels should be treated differently as they prefer communications distinctively. Organizing collaborative workshops across teams will be beneficial in large companies.

    Graphic representations of customer experience across channels will allow all the members of various teams to understand the entire experience from the customer’s viewpoint. You will get answers to questions like, how they prefer to be addressed, what they think while browsing the products, what they like to see and do and how do they feel about the experience and service. Customer journey mapping helps in designing contextualized marketing campaigns & messages to promote a brand’s offerings.

    User Journey maps are the best way to discover the “what ifs” that come up during research and conceptual design.

    Must have Components while Customer Journey Mapping

    • Personas: The main qualities which describes the needs, goals, thoughts, feelings, opinions, expectations, and pain points of the customers.
    • Timeline: Definite time frame (say, 1 week or 1 year) or fluctuating conditions which could be like awareness, decision-making, purchase, renewal.
    • Emotion: Graphs or diagrams describing frustration, irritation, anxiety, joy, happiness etc.
    • Touchpoints: User’s actions and interactions with the brand.
    • Channels: Medium where the interaction takes place such as website, native app, call center, in-store.
    • Moments of Truth: A positive or negative interaction and its outcomes. Experiences that left a lasting impression and moments that made an unsatisfactory notion about your brand.
    • Supporting Attributes: Surrounding individuals like caregivers, friends, colleagues who might add into the experience.

    Customer Journey Mapping Process

    1. Goals Assessment
    2. Evaluate enterprise goals for the product or service as the larger goal and have specific goals for customer journey mapping strategy.

    3. Detailed Research
    4. Ensure all relevant user research are done on quantitative and qualitative data insights of customer experience. Do whatever it takes to make a thorough research, use approaches like user interviews, contextual inquiry, ethnography, customer surveys, customer support, complaints, web analytics, social listening and competitive sense.

    5. Analyze Touchpoint and Channels
    6. Produce a list of the channels and customer touchpoints where interactions occur every day. Discuss about any other channels or touchpoints that can be added while mapping the journey.

      Take for example, if the touchpoint is “making a payment”, then the channels related with this touchpoint can be “pay online,” “pay via mail” or “pay in person.”

    7. Empathy Mapping
    8. Empathy maps portray various aspects of a persona and his/her experiences in any given scenario. This will help you in classifying your observations, understanding your customers extensively, and use the insights at appropriate times.

      This method acts as the groundwork for journey mapping. The objective is to get an overall picture of your customer’s thoughts, their sight, what they listen, what they say or do.

    9. Designing with lenses
    10. The purpose of brainstorming is to generate ideas using “lenses” or primary points based on brand’s key features, key concepts of the brand ideology or problem-solving viewpoints and so on. By doing this activity, the whole team gets involved, heard and seen; and you never know where your next inspiration is from.

    11. Affinity Diagram
    12. Post the brainstorming with lenses activity, the next step is putting it down as diagrams and exploring possibilities and solutions for customers. In this method, ideas are sorted into categories and labeled.

    13. Journey Outline
    14. Now comes the most exciting part of the process – journey mapping. You put everything together – timeline, touchpoints, channels, platforms, emotional highs and lows and the new ideas that were generated by the teams Et Al.

      There is no right way to draw the map, no manual, just go with your creative best.

    15. Digital Representation
    16. Not many companies have it as an elegant deliverable. It mostly ends up as sticky notes or sketches on white board. It is advisable to have a refined map illustrated so that you can always go back to refer them and for the better understanding of the team members. Having a visual designer who can design the journey map will go a long way.

    17. Share and Apply
    18. It is always recommended to maintain journey maps consistently. For instance, you can set a time frame say for a quarter or year and assess your past and current customer experiences and realize how much has changed and what remains the same.

    19. Appreciate the effort
    20. Once the journey maps are created, share it with all the stakeholders of the business. Appreciate the effort of everyone involved.

    Conclusion

    Journey mapping is a process that provides a holistic view of the customer experience by uncovering moments of both frustration and delight throughout a series of interactions. Done successfully, it reveals opportunities to address customers’ pain points, alleviate fragmentation, and, ultimately, create a better experience for your users.

    Although journey maps are generally a tangible achievement, what also matters is the entire process of creating the maps. It pushes your team to think deeper and helps you to connect with customers at an individual level.

    Where do you stand in this whole schema of the thriving trend?


    • 0

    Functional Safety Delivered: ASIL-D Compliant Electronic Braking System for a Global Automotive Tier-1 Supplier


    About the Customer

    Our customer is a pioneer in brake system development and manufacturing. Taking a lead in safety critical automotive components development, they are developing an ASIL-D compliant brake system ECU.

    Business Challenge

    The proposed brake system is ASIL-D compliant and thus entails the most rigorous development and testing measures implemented using ISO 26262 qualified tools.  Our customer required a technology partner that could take care of end-to-end development of an ASIL-D compliant brake ECU including software and hardware development.

    The proposed electronic brake ECU would enable the vehicle to replace the manual parking brake lever with a dedicated control unit. There are two variants of this ECU:

    Stand Alone: ECU activates the parking brake directly

    EPB Stand Alone

    Integrated: ECU activates the parking brake through commands from Electronic Stability Control system.

    EPB integrated

    An ASIL-D grade solution requires a certain degree of maturity in the understanding and implementation of ISO 26262 standard across the product’s lifecycle. The customer was looking for a technology partner that ticked all these boxes.
     

    Embitel Solution

    Our Functional Safety team identified the safety activities required for the execution of an ASIL D project. The activities included devising a safety plan, preparing the Development Interface Agreement (DIA) and Data Management Plan (DMP). Since it was an end-to-end project, a cross-functional team comprising hardware and software engineers along with ISO 26262 experts was set up.

    Team Organization

    Post a few joint workshops with the customer’s team, we were clear with the requirements. Documentation of the system-level requirements were performed while we kick-started the concept and system phase of the safety lifecycle. Here is a snapshot of the steps included:

    • Item definition: Based on the information provided by the customer we derived the item definition of the brake system. It paved the way for HARA and helped in development of functional and technical safety requirements.
    • Hazard Assessment and Risk Analysis (HARA): We assessed the malfunctions that could possibly lead to E/E system hazards and analyzed the risk associated with them.
    • Safety Goals derivation: Safety goals were derived as the output of HARA analysis.
    • Development of Functional Safety Requirements (FSR) and Technical Safety Requirements (TSR): We derived the FSR from the safety goals and TSR from functional safety requirements.

    Based on the safety goals, TSR and FSR, system architecture were prepared which followed the software and hardware architecture along with BOM creation.
     

    Embitel Impact

    We provided the customer with complete software and hardware development support as per ASIL D requirements. Being a one-stop destination for both development and ISO 26262 compliance activities, we were able to save a substantial amount of time and cost for the customer. As a result, the time-to-market was expedited by several months.

    Tools and Technologies

    Codebramer ALM Tool: We used Codebeamer for application lifecycle management

    MATLAB from Mathworks: MATLAB was used for software modelling


    • 0

    Building a Project in AEM 6.5 with React Integration

    Category : ecommerce-insights

     
    React is the most favorite programming language amongst front-end developers ever since its release in 2015. Adobe Experience Manager (AEM), one of the sought-after Content Management Solutions (CMS), is preferred by most companies across the globe. Imagine the kind of impact it is going to make when both are combined; they will surely bring incredible changes in websites and mobile applications.

    Not many know that installing AEM on local and integrating React for the front- end is pretty simple.

    Now even AEM as a cloud service has react as inbuilt program into its archetype as part of Adobe’s best practices known to its Headless CMS architecture.

    We have come up with a comprehensive step-by-step guide to help you out while working on AEM 6.5 and React integration. Take a look:

    What will the Article Cover?

    • Setup
    • AEM and React
    • Maven
    • Generate a new project using the AEM Archetype
    • Install React with CRA
    • Configure the aem-clientlibs generator
    • Configure the frontend-maven-plugin
    • Integrate the React app via the client library

    Introduction

    AEM has multiple options for defining headless endpoints and delivering its content as JSON. Building a React JS app in a pure Headless scenario.

    JavaScript Object Notation (JSON) is strictly a text-based format used to represent structured data and is based on JavaScript object syntax. Its lightweight format enables to store and transport data. It is possible for a JavaScript program to convert JSON data into native JavaScript objects.

    Another interesting fact is, JSON data code can be written in any programming language.

    Setup

    • Install Java 1.8+ and setup the environment variable Environment Variable with JAVA_HOME/bin
    • Install Apache Maven 3.3.39+ and setup the environment variable Environment Variable with MAVEN_HOME/bin
    • Install Node.js v10+ and npm v6+. For front end, we need Node.js and npm installed. Node comes with npm so once the installation is done, please check if both tools were added to system by running these commands in command line node -v npm -v Which will print the version.
    • Installation of AEM and React steps explained in upcoming blocks

    AEM and React

    Install AEM 6.5 locally.
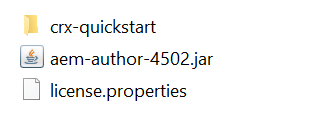
    Please have the .jar file and license provided; the package should look like this.
    Extract the JAR
    Either through double-click on JAR or through command line with command
    java -jar aem-author-4502.jar

    AEM and React

    To install AEM, create a new folder, for example C:\Program Files\aem. Then, follow the steps below:

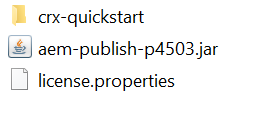
    Place the .jar and license files in this directory, and create two new folders: one called author, and one called publish.

    Copy the .jar and license file to the author folder. Then, copy the same files to the publish folder, but this time, rename the jar file as follows:

    AEM publish

    Now you can double-click the author .jar, and this will start up the instance of AEM locally. You should see something like this:

    AEM Local


    This will open the author instance running on localhost, on port 4502.

    Port 4502


    Maven

    Maven is an exceptional management tool which is based on POM (Project Object Model). It is predominantly used for any Java-based projects build, dependency and documentation.

    Add the Adobe public profile to your Maven settings.xml

    The overview of this process is also described here, but I will list the steps below.

    There are two locations where the Maven settings.xml file has been added:

    • in the Maven installation folder, under ${maven.home}/conf/settings.xml
    • in your user folder, under ${user.home}/.m2/settings.xml

    It’s not mandatory to see both these files, but the first one should be there. If both files are present, their content gets merged, and the user-specific settings are applied.

    Let’s add the Adobe public profile to the first file. Under settings, you should see something like this:

    <settings xmlns=”http://maven.apache.org/SETTINGS/1.0.0″
    xmlns:xsi=”http://www.w3.org/2001/XMLSchema-instance”xsi:schemaLocation=”http://maven.apache.org/SETTINGS/1.0.0https://maven.apache.org/xsd/settings-1.0.0.xsd”><localRepository/><interactiveMode/><offline/><pluginGroups/><servers/><mirrors/><proxies/><profiles/><activeProfiles/></settings>

    The Adobe profile should be added under <profiles>:

    <profiles>
    <!– ====================================================== –>
    <!– A D O B E P U B L I C P R O F I L E –>
    <!– ====================================================== –>
    <profile>
    <id>adobe-public</id>
    <activation>
    <activeByDefault>false</activeByDefault>
    </activation>
    <properties>
    <releaseRepository-Id>adobe-public-releases</releaseRepository-Id>
    <releaseRepository-Name>Adobe Public Releases</releaseRepository-Name>
    <releaseRepository-URL>https://repo.adobe.com/nexus/content/groups/public</releaseRepository-URL>
    </properties>
    <repositories>
    <repository>
    <id>adobe-public-releases</id>
    <name>Adobe Public Repository</name>
    <url>https://repo.adobe.com/nexus/content/groups/public</url>
    <releases>
    <enabled>true</enabled>
    <updatePolicy>never</updatePolicy>
    </releases>
    <snapshots>
    <enabled>false</enabled>
    </snapshots>
    </repository>
    </repositories>
    <pluginRepositories>
    <pluginRepository>
    <id>adobe-public-releases</id>
    <name>Adobe Public Repository</name>
    <url>https://repo.adobe.com/nexus/content/groups/public</url>
    <releases>
    <enabled>true</enabled>
    <updatePolicy>never</updatePolicy>
    </releases>
    <snapshots>
    <enabled>false</enabled>
    </snapshots>
    </pluginRepository>
    </pluginRepositories>
    </profile>
    </profiles>

    Then, right under </profiles>, add these lines also:

    </profiles>
    <activeProfiles>
    <activeProfile>adobe-public</activeProfile>
    </activeProfiles>
    </settings>

    Now, check if the setup is working by running this command in the command line:

    mvn help:effective-settings

    Generate a New Project Using the AEM Archetype

    Start the local AEM author environment by double-clicking the aem-author-p4502.jar file. This should be running in the background.

    Then, get the AEM project archetype from here. Add it to the same project folder, then open the command line and in that folder, run this command:

    mvn -B archetype:generate -DarchetypeGroupId=com.adobe.granite.archetypes -DarchetypeArtifactId=aem-project-archetype -DarchetypeVersion=23 -DaemVersion=6.5.0 -DappTitle=”AemReact” -DappId=”aemreact” -DgroupId=”com.aemreact” -DfrontendModule=”react” -DincludeExamples=n

    This will create a new folder called “aemreact” with all the needed tools and dependencies. Also, you should see an ui.frontend folder, which contains your React application and dependencies.

    In the parent folder of your project, run this command to deploy your project, as it is for now, to your local AEM instance:

    mvn clean install -PautoInstallPackage -Padobe-public

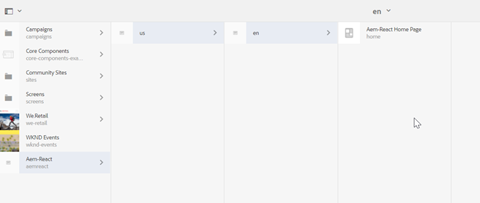
    If you now navigate in the browser to http://localhost:4502, you should see the AEM React project:

    Localhost 4502


    The problem that I had with this setup was that the React app was not loaded into AEM, so the page was blank. For this reason, I installed create-react-app on top of this implementation, and then used this application instead of the default one.

    Install React with CRA

    Create-react-App (CRA) is one of the popular tools used to create, build and test a React app. CRA creates front-end build pipeline and enables you to use it with any backend of your choice. It does not address databases or backend logics.

    Install React using create-react-app (CRA), by running this command in the aemreact folder, in the terminal:

    npx create-react-app react-app

    Now move to the react-app folder, and run this command in the terminal:

    npm install
    npm run start

    Your React application should be available at http://localhost:3000 to view it in the browser.

    Next step is to build the production build by running this command in the terminal:

    npm run build

    In VSCode I usually open another terminal, but you can also press ctrl+c for stopping the previous process and then run this command.
     

    Move the React files into an AEM client library

    We want our React app to run inside AEM, not as a separate project, so we need to move these files into an AEM client library and deploy it as part of the ui.apps module.

    UI.app is a modern browser-based no-code editor. Build anything, ship anywhere.

    We will use two tools for this:

    Configure the aem-clientlibs generator

    In your aemreact/react-app folder, install the aem-clientlibs-generator node plugin by running this command in the terminal:

    npm install aem-clientlib-generator –save-dev// You should see the dev dependency added to your package.json file.

    Next, create a new file in the react-app folder, and name it clientlib.config.js. In this file, add the following code:

    module.exports = {// default working directory (can be changed per ‘cwd’ in every asset option)context: __dirname,// path to the clientlib root folder (output)clientLibRoot: “./../ui.apps/src/main/content/jcr_root/apps/aemreact/clientlibs”,libs: {name: “react-app”,allowProxy: true,categories: [“aemreact.react”],serializationFormat: “xml”,jsProcessor: [“min:gcc”],assets: {js: [“build/static/**/*.js”],css: [“build/static/**/*.css”]}}};

    Next, add the clientlib directive as part of the npm run build script by updating react-app/package.json file as follows:

    {“name”: “react-app”,
    “version”: “0.1.0”,
    “private”: true,
    “dependencies”: {
    “@testing-library/jest-dom”: “^4.2.4”,
    “@testing-library/react”: “^9.5.0”,
    “@testing-library/user-event”: “^7.2.1”,
    “react”: “^16.13.1”,
    “react-dom”: “^16.13.1”,
    “react-scripts”: “3.4.1”
    },
    “scripts”: {
    “start”: “react-scripts start”,
    “build”: “react-scripts build && clientlib –verbose”,
    “test”: “react-scripts test”,
    “eject”: “react-scripts eject”
    },
    “eslintConfig”: {
    “extends”: “react-app”
    },
    “browserslist”: {
    “production”: [
    “>0.2%”,
    “not dead”,
    “not op_mini all”
    ],
    “development”: [
    “last 1 chrome version”,
    “last 1 firefox version”,
    “last 1 safari version”
    ] },
    “devDependencies”: {
    “aem-clientlib-generator”: “^1.7.1”
    }
    }

    To test if it’s all good until now, run this command in the react-app folder, in the terminal:

    npm run build

    You should now see in ui/apps/src/main/content/jcr_root/apps/react-app/clientlibs/ a folder named react-app, which contains css and js files generated from the react app.

    Configure the frontend-maven-plugin

    The next step is to turn the react-app project into a Maven module. You can do this by following the steps below:

    1. Open the parent xml file found in the aemreact/ folder. Add the following code:

    <?xml version=”1.0″ encoding=”UTF-8″?><!–| Copyright 2015 Adobe Systems Incorporated|| Licensed under the Apache License, Version 2.0 (the “License”);| you may not use this file except in compliance with the License.| You may obtain a copy of the License at|| http://www.apache.org/licenses/LICENSE-2.0|| Unless required by applicable law or agreed to in writing, software| distributed under the License is distributed on an “AS IS” BASIS,| WITHOUT WARRANTIES OR CONDITIONS OF ANY KIND, either express or implied.| See the License for the specific language governing permissions and| limitations under the License.–><project xmlns=”http://maven.apache.org/POM/4.0.0″xmlns:xsi=”http://www.w3.org/2001/XMLSchema-instance”xsi:schemaLocation=”http://maven.apache.org/POM/4.0.0 http://maven.apache.org/maven-v4_0_0.xsd”><modelVersion>4.0.0</modelVersion><groupId>com.aemreact</groupId><artifactId>aemreact</artifactId><packaging>pom</packaging><version>1.0-SNAPSHOT</version><description>AemReact</description><modules><module>all</module><module>core</module><module>react-app</module><!–<module>ui.frontend</module>–><module>ui.apps</module><module>ui.apps.structure</module><module>ui.content</module><module>it.tests</module><module>it.launcher</module><module>dispatcher</module></modules><properties><aem.host>localhost</aem.host><aem.port>4502</aem.port><aem.publish.host>localhost</aem.publish.host><aem.publish.port>4503</aem.publish.port><sling.user>admin</sling.user><sling.password>admin</sling.password><vault.user>admin</vault.user><vault.password>admin</vault.password><!– Update: Used by frontend-maven-plugin –><frontend-maven-plugin.version>1.6</frontend-maven-plugin.version><node.version>v8.16.1</node.version><npm.version>6.4.1</npm.version><!– end update –><core.wcm.components.version>2.8.0</core.wcm.components.version><bnd.version>5.0.0</bnd.version><project.build.sourceEncoding>UTF-8</project.build.sourceEncoding><project.reporting.outputEncoding>UTF-8</project.reporting.outputEncoding><spa.project.core.version>1.0.6</spa.project.core.version></properties><build><plugins><!– Maven Release Plugin –><plugin><groupId>org.apache.maven.plugins</groupId><artifactId>maven-release-plugin</artifactId><version>2.5.3</version><configuration><scmCommentPrefix>[maven-scm] :</scmCommentPrefix><preparationGoals>clean install</preparationGoals><goals>install</goals><releaseProfiles>release</releaseProfiles></configuration></plugin><!– Maven Source Plugin –><plugin><groupId>org.apache.maven.plugins</groupId><artifactId>maven-source-plugin</artifactId><version>3.0.1</version><inherited>true</inherited></plugin><!– Maven Enforcer Plugin –><plugin><groupId>org.apache.maven.plugins</groupId><artifactId>maven-enforcer-plugin</artifactId><executions><execution><id>enforce-maven</id><goals><goal>enforce</goal></goals><configuration><rules><requireMavenVersion><version>[3.3.9,)</version></requireMavenVersion><requireJavaVersion><message>Project must be compiledwith Java 8 or higher</message><version>1.8.0</version></requireJavaVersion></rules></configuration></execution></executions></plugin><!– Maven Compiler Plugin –><plugin><groupId>org.apache.maven.plugins</groupId><artifactId>maven-compiler-plugin</artifactId><configuration><source>1.8</source><target>1.8</target></configuration></plugin></plugins><pluginManagement><plugins><plugin><groupId>com.github.eirslett</groupId><artifactId>frontend-maven-plugin</artifactId><version>1.7.6</version><configuration><nodeVersion>v10.13.0</nodeVersion><npmVersion>6.9.0</npmVersion></configuration><executions><execution><id>install node and npm</id><goals><goal>install-node-and-npm</goal></goals></execution><execution><id>npm install</id><goals><goal>npm</goal></goals></execution></executions></plugin><!– Maven Jar Plugin –><plugin><groupId>org.apache.maven.plugins</groupId><artifactId>maven-jar-plugin</artifactId><version>3.1.2</version></plugin><!– Maven Clean Plugin –><plugin><groupId>org.apache.maven.plugins</groupId><artifactId>maven-clean-plugin</artifactId><version>3.0.0</version></plugin><!– BND Maven Plugin –><plugin><groupId>biz.aQute.bnd</groupId><artifactId>bnd-maven-plugin</artifactId><version>${bnd.version}</version><executions><execution><id>bnd-process</id><goals><goal>bnd-process</goal></goals><configuration><bnd><![CDATA[Bundle-Category: ${componentGroupName}# export all versioned packages except for conditional ones (https://github.com/bndtools/bnd/issues/3721#issuecomment-579026778)-exportcontents: ${removeall;${packages;VERSIONED};${packages;CONDITIONAL}}# reproducible builds (https://github.com/bndtools/bnd/issues/3521)-noextraheaders: true-snapshot: SNAPSHOTBundle-DocURL:-plugin org.apache.sling.caconfig.bndplugin.ConfigurationClassScannerPlugin-plugin org.apache.sling.bnd.models.ModelsScannerPlugin]]></bnd></configuration></execution></executions><dependencies><dependency><groupId>org.apache.sling</groupId><artifactId>org.apache.sling.caconfig.bnd-plugin</artifactId><version>1.0.2</version></dependency><dependency><groupId>org.apache.sling</groupId><artifactId>org.apache.sling.bnd.models</artifactId><version>1.0.0</version></dependency></dependencies></plugin><plugin><groupId>biz.aQute.bnd</groupId><artifactId>bnd-baseline-maven-plugin</artifactId><version>${bnd.version}</version></plugin><!– Maven Resources Plugin –><plugin><groupId>org.apache.maven.plugins</groupId><artifactId>maven-resources-plugin</artifactId><version>3.0.2</version></plugin><!– Maven Compiler Plugin –><plugin><groupId>org.apache.maven.plugins</groupId><artifactId>maven-compiler-plugin</artifactId><version>3.8.1</version></plugin><!– Maven Installer Plugin –><plugin><groupId>org.apache.maven.plugins</groupId><artifactId>maven-install-plugin</artifactId><version>2.5.2</version></plugin><!– Maven Surefire Plugin –><plugin><groupId>org.apache.maven.plugins</groupId><artifactId>maven-surefire-plugin</artifactId><version>2.22.1</version><configuration><useSystemClassLoader>false</useSystemClassLoader></configuration></plugin><!– Maven Failsafe Plugin –><plugin><groupId>org.apache.maven.plugins</groupId><artifactId>maven-failsafe-plugin</artifactId><version>2.22.1</version></plugin><!– Maven Deploy Plugin –><plugin><groupId>org.apache.maven.plugins</groupId><artifactId>maven-deploy-plugin</artifactId><version>2.8.2</version></plugin><!– Apache Sling Plugin –><plugin><groupId>org.apache.sling</groupId><artifactId>sling-maven-plugin</artifactId><version>2.4.0</version><configuration><slingUrl>http://${aem.host}:${aem.port}/system/console</slingUrl><deploymentMethod>WebConsole</deploymentMethod></configuration></plugin><!– HTL Maven Plugin –><plugin><groupId>org.apache.sling</groupId><artifactId>htl-maven-plugin</artifactId><version>1.3.4-1.4.0</version><configuration><failOnWarnings>true</failOnWarnings></configuration></plugin><!– Jackrabbit FileVault Package Plugin –><plugin><groupId>org.apache.jackrabbit</groupId><artifactId>filevault-package-maven-plugin</artifactId><version>1.0.3</version><configuration><filterSource>src/main/content/META-INF/vault/filter.xml</filterSource></configuration></plugin><!– Content Package Plugin –><plugin><groupId>com.day.jcr.vault</groupId><artifactId>content-package-maven-plugin</artifactId><version>1.0.2</version><configuration><targetURL>http://${aem.host}:${aem.port}/crx/packmgr/service.jsp</targetURL><failOnError>true</failOnError><userId>${vault.user}</userId><password>${vault.password}</password></configuration></plugin><!– Maven Enforcer Plugin –><plugin><groupId>org.apache.maven.plugins</groupId><artifactId>maven-enforcer-plugin</artifactId><version>1.4.1</version></plugin><!– Maven Dependency Plugin –><plugin><groupId>org.apache.maven.plugins</groupId><artifactId>maven-dependency-plugin</artifactId><version>3.0.0</version></plugin><!– Build Helper Maven Plugin –><plugin><groupId>org.codehaus.mojo</groupId><artifactId>build-helper-maven-plugin</artifactId><version>3.0.0</version></plugin><!–This plugin’s configuration is used to store Eclipsem2e settings only. It has no influence on the Maven build itself. –><plugin><groupId>org.eclipse.m2e</groupId><artifactId>lifecycle-mapping</artifactId><version>1.0.0</version><configuration><lifecycleMappingMetadata><pluginExecutions><pluginExecution><pluginExecutionFilter><groupId>org.apache.maven.plugins</groupId><artifactId>maven-enforcer-plugin</artifactId><versionRange>[1.0.0,)</versionRange><goals><goal>enforce</goal></goals></pluginExecutionFilter><action><ignore /></action></pluginExecution><pluginExecution><pluginExecutionFilter><groupId>org.apache.maven.plugins</groupId><artifactId>maven-dependency-plugin</artifactId><versionRange>[2.2,)</versionRange><goals><goal>copy-dependencies</goal><goal>unpack</goal></goals></pluginExecutionFilter><action><ignore /></action></pluginExecution><pluginExecution><pluginExecutionFilter><groupId>org.codehaus.mojo</groupId><artifactId>build-helper-maven-plugin</artifactId><versionRange>[1.5,)</versionRange><goals><goal>reserve-network-port</goal></goals></pluginExecutionFilter><action><ignore /></action></pluginExecution></pluginExecutions></lifecycleMappingMetadata></configuration></plugin></plugins></pluginManagement></build><profiles><!– ====================================================== –><!– A D O B E P U B L I C P R O F I L E –><!– ====================================================== –><profile><id>adobe-public</id><activation><activeByDefault>true</activeByDefault></activation><properties><releaseRepository-Id>adobe-public-releases</releaseRepository-Id><releaseRepository-Name>Adobe Public Releases</releaseRepository-Name><releaseRepository-URL>https://repo.adobe.com/nexus/content/groups/public</releaseRepository-URL></properties><repositories><repository><id>adobe-public-releases</id><name>Adobe Public Repository</name><url>https://repo.adobe.com/nexus/content/groups/public</url><releases><enabled>true</enabled><updatePolicy>never</updatePolicy></releases><snapshots><enabled>false</enabled></snapshots></repository><repository><id>adobe-aem-releases</id><name>Adobe AEM Repository</name><url>https://downloads.experiencecloud.adobe.com/content/maven/public</url><releases><enabled>true</enabled><updatePolicy>never</updatePolicy></releases><snapshots><enabled>false</enabled></snapshots></repository></repositories><pluginRepositories><pluginRepository><id>adobe-public-releases</id><name>Adobe Public Repository</name><url>https://repo.adobe.com/nexus/content/groups/public</url><releases><enabled>true</enabled><updatePolicy>never</updatePolicy></releases><snapshots><enabled>false</enabled></snapshots></pluginRepository></pluginRepositories></profile><!– Development profile: install only the bundle –><profile><id>autoInstallBundle</id><!–To enable this feature for a bundle, the sling-maven-plugin(without configuration) needs to be included:<plugin><groupId>org.apache.sling</groupId><artifactId>sling-maven-plugin</artifactId></plugin>–><activation><activeByDefault>false</activeByDefault></activation><build><pluginManagement><plugins><plugin><groupId>org.apache.sling</groupId><artifactId>sling-maven-plugin</artifactId><executions><execution><id>install-bundle</id><goals><goal>install</goal></goals></execution></executions></plugin></plugins></pluginManagement></build></profile><profile><id>autoInstallPackage</id><activation><activeByDefault>false</activeByDefault></activation><build><pluginManagement><plugins><plugin><groupId>org.apache.jackrabbit</groupId><artifactId>filevault-package-maven-plugin</artifactId><executions><execution><id>create-package</id><goals><goal>package</goal></goals></execution></executions></plugin><plugin><groupId>com.day.jcr.vault</groupId><artifactId>content-package-maven-plugin</artifactId><executions><execution><id>install-package</id><goals><goal>install</goal></goals><configuration><targetURL>http://${aem.host}:${aem.port}/crx/packmgr/service.jsp</targetURL></configuration></execution></executions></plugin></plugins></pluginManagement></build></profile><profile><id>autoInstallPackagePublish</id><activation><activeByDefault>false</activeByDefault></activation><build><pluginManagement><plugins><plugin><groupId>org.apache.jackrabbit</groupId><artifactId>filevault-package-maven-plugin</artifactId><executions><execution><id>create-package</id><goals><goal>package</goal></goals></execution></executions></plugin><plugin><groupId>com.day.jcr.vault</groupId><artifactId>content-package-maven-plugin</artifactId><executions><execution><id>install-package-publish</id><goals><goal>install</goal></goals><configuration><targetURL>http://${aem.publish.host}:${aem.publish.port}/crx/packmgr/service.jsp</targetURL></configuration></execution></executions></plugin></plugins></pluginManagement></build></profile></profiles><!–
    ===================================================================
    === –><!– D E P E N D E N C I E S –><!–

    ====================================================================== –><dependencyManagement><dependencies><!– OSGi Dependencies –><dependency><groupId>org.osgi</groupId><artifactId>org.osgi.annotation.versioning</artifactId><version>1.1.0</version><scope>provided</scope></dependency><dependency><groupId>org.osgi</groupId><artifactId>org.osgi.annotation.bundle</artifactId><version>1.0.0</version><scope>provided</scope></dependency><dependency><groupId>org.osgi</groupId><artifactId>org.osgi.service.metatype.annotations</artifactId><version>1.4.0</version><scope>provided</scope></dependency><dependency><groupId>org.osgi</groupId><artifactId>org.osgi.service.component.annotations</artifactId><version>1.4.0</version><scope>provided</scope></dependency><dependency><groupId>org.osgi</groupId><artifactId>org.osgi.service.component</artifactId><version>1.4.0</version><scope>provided</scope></dependency><dependency><groupId>org.osgi</groupId><artifactId>org.osgi.service.cm</artifactId><version>1.6.0</version><scope>provided</scope></dependency><dependency><groupId>org.osgi</groupId><artifactId>org.osgi.service.event</artifactId><version>1.3.1</version><scope>provided</scope></dependency><dependency><groupId>org.osgi</groupId><artifactId>org.osgi.service.log</artifactId><version>1.4.0</version><scope>provided</scope></dependency><dependency><groupId>org.osgi</groupId><artifactId>org.osgi.resource</artifactId><version>1.0.0</version><scope>provided</scope></dependency><dependency><groupId>org.osgi</groupId><artifactId>org.osgi.framework</artifactId><version>1.9.0</version><scope>provided</scope></dependency><dependency><groupId>org.apache.sling</groupId><artifactId>org.apache.sling.servlets.annotations</artifactId><version>1.2.4</version><scope>provided</scope></dependency><!– Logging Dependencies –><dependency><groupId>org.slf4j</groupId><artifactId>slf4j-api</artifactId><version>1.7.21</version><scope>provided</scope></dependency><dependency><groupId>org.slf4j</groupId><artifactId>slf4j-simple</artifactId><version>1.7.25</version><scope>test</scope></dependency><!– Adobe AEM Dependencies –><dependency><groupId>com.adobe.aem</groupId><artifactId>uber-jar</artifactId><version>6.5.0</version><classifier>apis</classifier><scope>provided</scope></dependency><!– Apache Sling Dependencies –><dependency><groupId>org.apache.sling</groupId><artifactId>org.apache.sling.models.api</artifactId><version>1.3.6</version><scope>provided</scope></dependency><!– Servlet API –><dependency><groupId>javax.servlet</groupId><artifactId>javax.servlet-api</artifactId><version>3.1.0</version><scope>provided</scope></dependency><dependency><groupId>javax.servlet.jsp</groupId><artifactId>jsp-api</artifactId><version>2.1</version><scope>provided</scope></dependency><dependency><groupId>javax.annotation</groupId><artifactId>javax.annotation-api</artifactId><version>1.3.2</version><scope>provided</scope></dependency><!– JCR –><dependency><groupId>javax.jcr</groupId><artifactId>jcr</artifactId><version>2.0</version><scope>provided</scope></dependency><!– Taglibs –><dependency><groupId>com.day.cq.wcm</groupId><artifactId>cq-wcm-taglib</artifactId><version>5.7.4</version><scope>provided</scope></dependency><dependency><groupId>com.adobe.cq</groupId><artifactId>core.wcm.components.core</artifactId><version>${core.wcm.components.version}</version></dependency><dependency><groupId>com.adobe.cq</groupId><artifactId>core.wcm.components.content</artifactId><type>zip</type><version>${core.wcm.components.version}</version></dependency><dependency><groupId>com.adobe.cq</groupId><artifactId>core.wcm.components.config</artifactId><type>zip</type><version>${core.wcm.components.version}</version></dependency><!– SPA Project Core (includes hierarchy page model) –><dependency><groupId>com.adobe.aem</groupId><artifactId>spa.project.core.all</artifactId><type>zip</type><version>${spa.project.core.version}</version></dependency><dependency><groupId>com.adobe.aem</groupId><artifactId>spa.project.core.core</artifactId><version>${spa.project.core.version}</version></dependency><!– Testing –><dependency><groupId>org.junit</groupId><artifactId>junit-bom</artifactId><version>5.4.1</version><type>pom</type><scope>import</scope></dependency><dependency><groupId>org.mockito</groupId><artifactId>mockito-core</artifactId><version>2.25.1</version><scope>test</scope></dependency><dependency><groupId>org.mockito</groupId><artifactId>mockito-junit-jupiter</artifactId><version>2.25.1</version><scope>test</scope></dependency><dependency><groupId>junit-addons</groupId><artifactId>junit-addons</artifactId><version>1.4</version><scope>test</scope></dependency><dependency><groupId>io.wcm</groupId><artifactId>io.wcm.testing.aem-mock.junit5</artifactId><version>2.5.2</version><scope>test</scope></dependency><dependency><groupId>uk.org.lidalia</groupId><artifactId>slf4j-test</artifactId><version>1.0.1</version><scope>test</scope></dependency></dependencies></dependencyManagement></project>


    Next step is to create a new file named pom.xml in the aemreact/react-app folder. Add the following code:

    <?xml version=”1.0″ encoding=”UTF-8″?><project xmlns=”http://maven.apache.org/POM/4.0.0″ xmlns:xsi=”http://www.w3.org/2001/XMLSchema-instance” xsi:schemaLocation=”http://maven.apache.org/POM/4.0.0 http://maven.apache.org/maven-v4_0_0.xsd”><modelVersion>4.0.0</modelVersion><!– ===================================================================
    === –><!– P A R E N T P R O J E C T D E S C R I P T I O N –><!–
    ====================================================================== –><parent><groupId>com.aemreact</groupId><artifactId>aemreact</artifactId><version>1.0-SNAPSHOT</version><relativePath>../pom.xml</relativePath></parent><!– ===================================================================
    === –><!– P R O J E C T D E S C R I P T I O N –><!–
    ====================================================================== –><artifactId>aemreact.react.app</artifactId><packaging>pom</packaging><name>WKND Events – React App</name><description>UI React application code for WKND Events</description><!– ===================================================================
    === –><!– B U I L D D E F I N I T I O N –><!–
    ====================================================================== –><build><plugins><plugin><groupId>com.github.eirslett</groupId><artifactId>frontend-maven-plugin</artifactId><version>${frontend-maven-plugin.version}</version><executions><execution><id>install node and npm</id><goals><goal>install-node-and-npm</goal></goals><configuration><nodeVersion>${node.version}</nodeVersion><npmVersion>${npm.version}</npmVersion></configuration></execution><execution><id>npm install</id><goals><goal>npm</goal></goals><!– Optional configuration which provides for running any npm command –><configuration><arguments>install</arguments></configuration></execution><execution><id>npm run build</id><goals><goal>npm</goal></goals><configuration><arguments>run build</arguments></configuration></execution></executions></plugin></plugins></build></project>

    Within the react-app folder run the following Maven command to trigger a front end build:

    mvn clean install

    Then, move to the parent folder aemreact and in the terminal, run this command to build the entire project and deploy it to AEM:

    mvn -PautoInstallPackage -Padobe-public clean install

    If you now check the local AEM environment, and navigate to the CRXDE-Lite, you should see the project deployed under /apps/aemreact/clientlibs/react-app.

    Integrate the React app via the client library

    In the IDE, open up the file customheaderlibs.html which is found under

    \aemreact\ui.apps\src\main\content\jcr_root\apps\aemreact\components\page.

    Add the following code:

    <!–/*Custom Headerlibs for React Site*/–><meta name=”viewport” content=”width=device-width, initial-scale=1″><meta property=”cq:datatype” data-sly-test=”${wcmmode.edit || wcmmode.preview}” content=”JSON”/><meta property=”cq:wcmmode” data-sly-test=”${wcmmode.edit}” content=”edit”/><meta property=”cq:wcmmode” data-sly-test=”${wcmmode.preview}” content=”preview”/><meta property=”cq:pagemodel_root_url”data-sly-use.page=”com.adobe.aem.spa.project.core.models.Page”content=”${page.rootUrl}”/><sly data-sly-use.clientlib=”/libs/granite/sightly/templates/clientlib.html”><sly data-sly-call=”${clientlib.css @ categories=’aemreact.react’}”/>
    In the same folder, you should see a customfooterlibs.html file. Replace the existing code with the following:

    <!–/*Custom footer React libs*/–><sly data-sly-use.clientLib=”${‘/libs/granite/sightly/templates/clientlib.html’}”></sly><sly data-sly-test=”${wcmmode.edit || wcmmode.preview}”data-sly-call=”${clientLib.js @ categories=’cq.authoring.pagemodel.messaging’}”></sly><sly data-sly-call=”${clientLib.js @ categories=’aemreact.react’}”></sly>
    Then, create a new file in the same folder and name it body.html. Add the following code:
    <!–/* – body.html – includes div that will be targeted by SPA */–><div id=”root”></div>

    To deploy these changes to AEM, we need to run again this command in the project root folder (aemreact):

    mvn -PautoInstallPackage -Padobe-public clean install
    Navigate to your local AEM instance and you should see your new React application.
     

    AEM instance

    Conclusion

    We are not comparing React with any other frameworks. Each one comes with its own set of pros and cons; it all depends on your objectives.

    But the key attributes like ease-of-use, ease-of-learning, reusable components, great developer-friendly tools, fuss-free programming with JSX, and the entire ecosystem sets React framework apart from other languages.
     

    Author Bio

    Chiran
     
    Chiran is our Associate Director with an impressive record in Application design and Architecture. For over 11.5 years. He has been at the helm of various digital experience and e-commerce projects for leading software organizations.

    Chiran has completed his post-graduation in Computer Applications from Al Ameen College, Bangalore. Apart from work…. Chiran loves to nurture his passion for bikes and travelling.


    • 0

    Why E-commerce Migration? Top Reasons to Migrate for Business Success

    The Covid-19 pandemic has put digital commerce into a hyper-adoption mode by a wide range of industries. As a result of the lockdowns, there has been an increase in online shopping, encouraging local businesses to enter the E-commerce industry. Businesses are going through a digital transformation, and those who are currently online are searching for more stable and secure platforms.

    Ecommerce Migration

    It is not enough to be present on E-commerce platforms; it is also necessary to provide the best-in-class customer experience. E-commerce service providers are also transforming their systems and coming up with distinctive features to deliver memorable CX.

    Do you use any E-commerce platforms to run your business?

    Are you having trouble scaling up or growing your business in your current E-commerce platform?

    This article will explain why you should consider switching to a new E-commerce platform. But first, let’s understand E-commerce migration in layman’s terms.

    What is E-commerce Migration?

    Assume you own a small retail clothes store and operate it at XYZ location. Your outfits were well-received, and your business thrived as a result. Your inventory grows and customers are forming lines in front of your store. However, if you stay in the same place, your business may be constrained to that small shop, with limited opportunity to provide good customer service.

    As a result, you’ll need to shift to a more accommodating and spacious setup, where all of your customers will be welcomed, inventory will be plentiful, and other business demands will be addressed.

    On the other hand, if there isn’t enough foot traffic in your shop at the XYZ location, you might consider restrategizing, relocation to adapt to the new trends to boost sales.

    Similarly, in the E-commerce world, if sales growth is stifled or reach is limited, organisations should examine and outline their pain points in current E-commerce technology.

    Not sure where to begin? Don’t worry! Here, are some of the points that should be reviewed: –

    • Availability of all basic features

    • Check to see if your existing E-commerce platform has all of the essential features. Make a list of the features and functions required to run and scale up yourbusiness and those that are provided by your E-commerce platform.

      Different payment choices, upselling possibilities, managing digital assets including numerous images or videos of products, cart update options, and other features must all be analyzed.

      If your existing ecommerce platform cannot cater to these features, then it is time to analyse if you shoud continue on the same platform . Organization must consider revamping of the website to include all of the necessary basic features.

    • Competitor’s analysis to provide a better experience

    • While businesses try to provide their customers with a better shopping experience than their competitors, competitor analysis is necessary. It will assist the company in identifying new features offered by competitors and adapting to the current E-commerce trends that are well received by customers.

      For instance, during product search on competitor’s platform, if they recommend similar products or comparison list or they have some good articles/reviews on usage linked to the product description. Then, such points can be noted and incorporated to improve customer convenience.

      Businesses need to analyze and compare services and bring the best out of them to retain and increase their customer base.

    • Implementation of new features and extensions

    • With technological improvements, new features and useful extensions for upgrading the UI/UX have been available with different E-commerce service providers. Customers and businesses benefit from features such as One Step Checkout, Split Ordering, Megamenu extensions, SEO tool extensions, etc. Other additional capabilities include configurable prebuilt campaigns, segmentation options, and cross-channel marketing, all of which have proven to be beneficial to business growth.

      Businesses must evaluate whether their current platform provides these new features and extensions that will contribute to their business growth.

    • Third Party Applications integrations

    • In the market, there exist various business models with unique business needs. There are also unique solutions available in the market to address these specific needs, which are third-party solutions.

      E-commerce businesses are constantly aiming to improve their platforms in order to make them more convenient and user friendly for their customers. This is done in order to retain and grow customer loyalty as well as revenue.

      Businesses require a variety of external applications, such as ERP or accounting, in order to boost productivity and reduce manual input.

      Customer convenience necessitates the use of third-party applications that provide secured multiple payment gateways.

      Third-party solutions that are integrated with E-commerce platforms include shipping gateways, inventory management systems, CRM, ERP, and so on. These E-commerce integrations aid organizations to reduces manual work, saves time and money and lets business owners focus on expansion strategy. These integrations together assist to build a reliable and convenient E-commerce system.

    • Automated process in current E-commerce platform

    • End-to-end shopping processes, automated inventory management, and order processing systems, order tracking, automatic notifications and many such automated features are all available on new E-commerce platforms. Examine the tools’ availability and compatibility of those with your existing E-commerce platforms.

      If none are accessible, add them to your list of points to take informed decision on migration.

    • Security of customer and company’s data

    • Potential hackers are particularly interested in E-commerce sites. Many low-quality E-commerce service providers aren’t protected against cyberattacks. If hackers have access to a customer’s payment information, they will exploit it. As a result, organisations must devise methods to keep data safe and secure.

      The site’s security will be improved by installing an SSL certificate, web application firewall protection, automatic malware detection and installing other security extensions. It should be a primary focus to check with current E-commerce service providers for information on security levels.

      Click on the link to learn how Embitel helps business in E-commerce platform security using Magento platform.

      Businesses must thoroughly identify and document their weak points.

      Before proceeding further, there are a few more things that has to be considered before migration.

      Businesses must know the process to switch from the current E-commerce platform to their preferred platform. They should consider the following points: –

    • Choosing the right E-commerce partner

    • It depends on the requirements of your company based on the features you require versus the features offered by the E-commerce service providers.

      Another aspect worth consideration are frequency and costs associated with the ecommerce site maintenance.

      Businesses must also use the time mapping technique to determine the amount of time required by different E-commerce service providers from inquiry to E-commerce platform migration. Businesses should consider the time it will take to import data, as well as the time it will take to integrate extensions and plugins before finalizing the migration process.

      Below is a checklist that business must look for before choosing the right partner: –

      1. Policy of E-commerce service provider for migration.
      2. Data migration timeline and backup strategy.
      3. Security levels for data protection during migration
      4. Cost Analysis of different platforms and integrations
    • Financial requirement for migration to new E-commerce platform

    • The financial resources required to implement any preferred E-commerce technology must be reviewed. Businesses should evaluate the total cost spent on their existing E-commerce platform. If the cost of purchase is recovered but features seems to be inadequate, one can think of migration.

      Companies who have recouped their investment but are overpaying for maintenance must consider the cost of a new platform as well as the subsequent maintenance costs. In terms of the expected ROI, they should also consider the cost of extensions and additional features.

      Businesses might decide whether or not to migrate to a new platform after assessing such conditions. As E-commerce migration can be a costly affair, key beneficial points must be thoroughly evaluated and decision-makers must conclude wisely.

    Author’s note: –

    E-commerce Migration is beneficial, inevitable, and cumbersome. If you resolve your pain points and wish to grow your business then migration seems to be unavoidable. Embitel can craft creative, innovative solutions that cater to all your needs. If your existing E-commerce platform is struggling to keep up with your large data and is unresponsive, it’s time to mail on sales@embitel.com. Embitel team will help you select the right E-commerce platform according to your needs and strengthen you in your business success.


    • 0

    Optimizing Magento 2 Website Performance Using Magepack Bundling

    Tags :


    A slow loading webpage is one of the worst nightmares for an e-commerce store owner that can cost him both revenue and customer loyalty. Website load speed is infact a critical ranking  factor for Google search and display ads. So, how do you optimize your page load speed and ensure that your website visitors are not disappointed with a terribly slow page? One of the best methods is to optimize the impact of render-blocking resources such as JavaScript files, which have a profound impact on the process of web page rendering.


    In this whitepaper, we will be exploring about a leading website optimization technique – Advanced JavaScript Bundling using Magepack  for Ecommerce sites running on Magento.


    Your Name (*)

    Job Title(*)

    Your Email (*)

    Company Name(*)

    Phone Number

    Country

    Enter the Captcha(*)

    captcha